You really don’t have to spend a ton of money on beauty treatments to look and feel your best. Instead, try these at-home, DIY beauty hacks.
From how to grow your lashes to preventing wrinkles at home, here are my favorite DIY beauty hacks. They actually work!
Download the Krazy Coupon Lady app to get the latest and greatest coupons.
DIY Beauty Hacks for Thickening and Lengthening Your Lashes
1. Skip $200 eyelash extensions and use castor oil for lash growth.

On average, eyelash extensions cost somewhere between $150 and $200 for an initial set, plus $55 to $65 for each fill (which you’re supposed to do every two to three weeks). Even eyelash growth serums cost anywhere from $45 to hundreds of dollars.
Instead, use castor oil — which you can buy for less than $8 on Amazon! — to replace expensive serums and eyelash extensions. Here’s how:
- Clean your face and remove any eye makeup.
- Take a clean eyelash brush (I use old mascara wands I’ve sanitized)and slowly dip it into the castor oil.
- Use the brush to carefully apply the oil onto your eyelashes.
It’s best to do this at night before bed. In the morning, use makeup remover to remove the oil from your lashes. I noticed longer lashes in just a couple of weeks!
2. Apply baby powder in between mascara applications for thick, luxurious lashes.

If there’s one makeup product I can’t live without, it’s mascara. But the good stuff is expensive!
I like to use baby powder (not talc!) in between mascara applications. It makes my lashes noticeably thicker and makes my mascara last longer. Here’s how to apply:
- Use an eyelash curler on your lashes.
- Apply one coat of mascara.
- Shake baby powder into your palm.
- Use a Q-tip to apply powder to both top and bottom of your lashes. They should be covered and look white.
- Apply another coat or two of mascara. (You can use a separate wand for the second swipe of mascara if you don’t want baby powder on your mascara wand.)
Voila! Thicker lashes at home by using something you already have.
DIY Beauty Hacks for Preventing Wrinkles
3. Place medical tape on your wrinkles to get the same effects as Botox.

Worried about deepening that line between your brows? Put medical tape over that and anywhere else you’ve dreamed of getting Botox, and leave it there while you sleep.
Look for the clear medical tape, like 3M Transpore clear 1-inch first aid tape.
RELATED: How to Live Rich With the Help of Couponing
4. Or fight off wrinkles with rose hip seed oil.

This essential oil has anti-aging properties, offers protection from age spots, helps with eczema and acne scarring, boosts your immune system, and corrects dark spots. There are so many great all natural products that I swear work just as good as the chemical-filled stuff.
I’ve been using rose hip oil for its anti-aging benefits for years and love it.
DIY Beauty Hacks for Eliminating Puffiness and Dark Under-Eye Circles
5. Use natural oil lip balm around your eyes instead of expensive eye creams.

Just use a glorified version of lip balm that is all natural and organic, like this set from Amazon. They’re made with Organic Sunflower Oil, Organic Beeswax, Organic Coconut Oil, Vitamin E, Organic Rosemary Extract, Organic Calendula. If it sounds good enough to eat, it’s probably good enough to put on your face.
6. Use cold green tea bags under your eyes to prevent puffiness and dark circles.

Sure, there are tons of high-end products out there that promise to prevent puffiness or dark circles under your eyes, but why would you pay $35-$100 or more when you probably have it in your pantry!?
- Steep two green tea bags (black tea and white tea work as well) in hot water.
- Squeeze any excess liquid from the tea bags and place them in the fridge for about 15-20 minutes.
- Close your eyes, and place the tea bags over your eyelids, leaving them on for 15-20 minutes.
If you make multiple tea bags, store some in the freezer for the next morning!
7. Use parsley to reduce discoloration, age spots, and puffiness.

Erase dark circles and age spots by using an herb? Yes, you read that correctly.
The Vitamin C, chlorophyll, and Vitamin K in parsley will help lighten skin discoloration, diminish age spots and reduce puffiness.
Use two tablespoons of plain yogurt and a handful of fresh parsley. Blend the two ingredients in a food processor and apply to the under eye area to replace expensive eye creams.
8. Reduce dark under-eye circles with Vitamin K.

Most under eye serums for dark circles are at least $30,, but you can buy Vitamin K serum for $18 and apply it directly under your eyes.
You can also take Vitamin K in capsule form and make a point to eat more Vitamin K foods — greens like broccoli, spinach, and other leafy vegetables — as well.
DIY Beauty Hacks for Your Skincare Routine
9. Use apple cider vinegar as a facial toner.
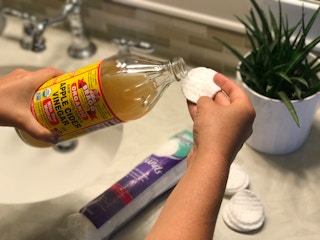
Apple cider vinegar is great to consume — it’s known to help reduce inflammation, harmful bacteria in the gut, and reduce blood sugar levels — but did you know it can improve your complexion, too?
The acidic fermented liquid balances and restores your skin’s natural pH, which keeps breakouts away and keeps your face nice and clean. Using apple cider vinegar as toner can help lighten sun and age spots, dissolve dead skin cells, fight because of its antibacterial qualities and even help minimize scarring, and reduce the appearance of pores.
Here’s how to use it at home:
- Pour one part organic raw apple cider vinegar into a glass jar, bottle or container.
- Add two parts distilled or filtered water.
- Shake the bottle to combine the mixture.
- Apply the toner to your freshly cleansed skin using a cotton ball or pad, avoiding the eye area.
- Apply your usual, daily moisturizer after the apple cider vinegar toner has dried.
- Shake well before each use. Store in a cool, dry, dark place — no need to refrigerate!
10. Skip buying expensive masks and make one with ingredients you already have.

Coat your face in plain honey for an all-natural, DIY facial at home. Honey is an antioxidant and is antibacterial, plus its stickiness can help pull dirt out of clogged pores. For a more soothing effect, add lavender; for a luxurious mask, add cooked oatmeal.
Either way, let the honey mask sit for 10 to 20 minutes and then use a damp washcloth to remove.
11. Make your own body scrub at home.

It’s super easy and inexpensive to make your own body scrub. I personally like a mix of ground coffee, coconut oil, and honey because they’re three things I already have, plus the combo is gentle enough to use on my face or hands, too.
To make your own body scrub, simply mix together a few tablespoons of honey, ½ cup of finely ground coffee, and a ¼ cup of coconut oil. Voilá!
12. Toothpaste doubles as a blemish spot treatment in lieu of expensive treatments.
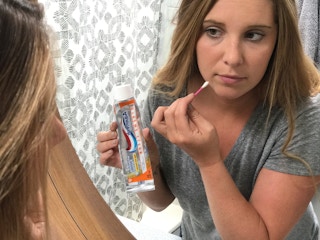
I remember my mom always using toothpaste on her zits overnight and of course, I thought she looked ridiculous doing so.
Little did I know…this trick actually works.
Check your toothpaste to see if it contains the key ingredients e zits which include baking soda, triclosan, alcohol, sodium pyrosulphate, menthol, fluoride, or hydrogen peroxide. A tube of toothpaste is a few bucks or is already in your medicine cabinet (we hope), while a 1-ounce bottle of Mario Badescu’s drying lotion is $17 and won’t last long.
If you’d rather go more natural, you can use natural organic toothpastes with fewer harsh chemicals and which also contain tea tree oil, witch hazel, aloe or eucalyptus.
RELATED: Ridiculously Amazing Toothpaste Hacks You’ve Never Heard Before
13. Use coconut oil instead of shaving cream.

It’s as simple as that. Use coconut oil next time you shave for the softest legs ever. You just need to try this one. Trust me.
PRO TIP: You can also use coconut oil as eye makeup remover!
DIY Beauty Hacks to Replace Expensive Makeup
14. Skip buying makeup towelettes and use baby wipes instead.
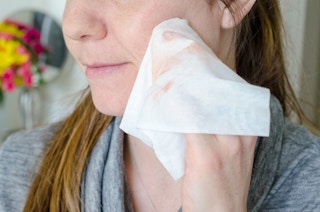
If you already have baby wipes around the house, use them to replace your makeup wipes. Not only do they remove all makeup, they are safer and better for your skin.
Cut them in half to make them last even longer!
15. Use a concealer with your lipstick to get the matte look.

Before you spend another dime on a new lipstick, you must try this.
Dab concealer on your lips before applying your regular lipstick. Not only does it make the color appear matte, it will help keep your lipstick on longer.
16. Skip lip injections (ouch!) and use peppermint oil to plump your lips.

So many women these days are getting lip injections and lip fillers. Those procedures can run $500 to $2,000 dollars!
No, thank you. I have been using peppermint oil in place of procedures and even expensive glosses — like BUXOM Full-On Plumping Lip Polish Gloss, which costs $21 — and it has the same effect.
There are three steps to this process:
- Create a coarse cinnamon, peppermint oil, and vaseline mixture.
- Apply a little bit of it, and scrub your lips with a toothbrush. Not only does this remove all the dead skin cells and make your lips super soft, it plumps them as well.
- Use peppermint oil with any lip gloss you have.
RELATED: ULTA Tips That Will Save You Serious Cash
DIY Beauty Hacks for Teeth and Nails
17. Try activated charcoal as a cheap alternative to professional teeth whitening.

I was skeptical about this at first…I mean when you first use it, your mouth is BLACK. But after a week or so of using activated charcoal, I noticed a difference!
I’ve tried all the teeth whitening products out there from the Crest White Strips, to dentist-quality whiteners. All of these make my teeth extremely sensitive for days after.
With the activated charcoal, you can say goodbye to sensitive teeth and hello to extra money. You can find activated charcoal at most natural health stores, or I buy my activated charcoal online through Amazon. It’ll save you hundreds of dollars on treatments and is as cheap as ten bucks!
18. Skip the gel manicures and do press-on nails at home that will look just as good.

A gel mani can run anywhere from $30 to $45, depending on where you live, and that’s not including the tip. But press-on nails have made a comeback, and tons of companies are making affordable kits that you can do yourself at home.
I personally have used Static Nails’ pop-on kits, which cost $16, are reusable, and come in dozens of cute designs and colors.
You can also find lots of options for DIY nails at ULTA. I’d recommend getting the kind that uses glue, as they last longer.
Don’t scroll up! Here are the related links mentioned here:
How to Live Rich With the Help of Couponing
Ridiculously Amazing Toothpaste Hacks You’ve Never Heard Before
ULTA Tips That Will Save You Serious Cash
UP NEXT: Even more tips for saving money at home!
Download the KCL app to add and redeem coupons in store
