
Get all the new deals and savings hacks straight to your inbox
Will be used in accordance with our Privacy Policy
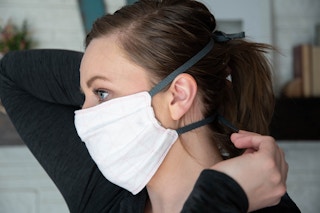
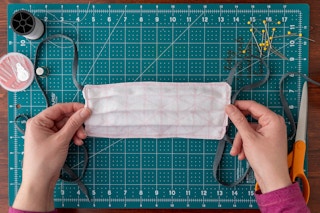
Since the White House and the CDC is still urging all Americans to cover our faces when we leave our homes, I’ve learned how to make a fabric face mask for cheap at home.
Good news is that it’s not hard. If you don’t own a sewing machine, you can still do it. It’ll be more time consuming, but it’s possible. You could consider teaming up with a neighbor who has a sewing machine, too. You could do the first portion by hand and when it comes time to sew the folds at the end, pass the project to your friend who can knock it out in five minutes on a sewing machine.
I bought the hand towels for this example at the Target Dollar Spot, at $5 for two towels. Look for cute tea towels at Amazon, Walmart.com, or shop online at a craft store in order to avoid going into the store.
Just make sure that the fabric is tightly woven and that you use a few layers, as per the CDC. An old 100% cotton t-shirt will also work if you don’t have access to the stores.
I learned how to make a fabric face mask from this New York Times article. I’m going to share my experience with you.
Here’s what you need in order to make a fabric face mask:
- 100% cotton fabric: dishtowels are ideal, if they are tightly woven. They’re 18″ x 28″ in general, but you’ll be able to get a few face masks out of that size. You can also up-cycle sheets or old t-shirts.
- Strings to hold the mask on your face: One pack of shoelaces per mask or strips of cotton fabric, 18″ x ¾” or use the thick hem of your towel.
- Needle and thread
- Sewing machine, if you have one, plus a heavy duty needle for the machine
- Scissors
- Pins (or paper clips if you can’t get a hold of any pins.)
If you are making masks to donate to first responders, JOANN will give you 20% off supplies!

JOANN fabric announced back in mid-2020 that they would donate kits needed to make five masks per each kit if you are making them for first responders as part of their Make to Give Face Masks Program. They’ve donated over 400K masks and exceeded their goal. But they are continuing a modified version of the program until masks are no longer needed anywhere. If you sign into the email popup, you get 20% off supplies.
Note: Even though the masks are not regulation, I imagine they are for off-duty responders or they meet the requirements of five layers of cotton.
Email them at joannplus@joann.com for details or call your local JOANN store to see if they have any available. Availability, like everything else, is limited so call first!
Step 1: Wash and dry the fabric on the highest temperature, then fold it in half.
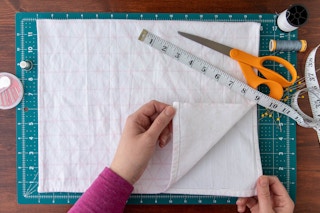
Step 2: Measure and pin two 9.5″ x 6.5″ squares.

You’re creating your mask base with this step. I had enough material from this one piece of fabric to make two masks.
Before I measured my fabric, I cut the thick, hemmed edges off my towel. If your towel has these double hems, you could use them as ties instead of shoelaces in a pinch. (Shoelaces will work better long term, because they will hold up in the washing machine better.)
Step 3: Cut along the lines you measured, through both layers at the same time.

RELATED: Tips for Shopping at Costco During the Coronavirus Pandemic
Step 4: Cut each shoe lace in half, resulting in four equal-size pieces.
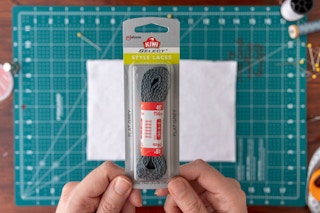
You can find flat shoelaces at Target.com or on Amazon.
The New York Times article I followed suggested ties should be 18″ in length. When I cut my shoelaces, they were longer than this, so I cut them down until they were 18″ in length.
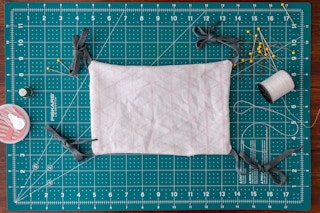
Step 5: Attach the cut sides of the laces to the corners of your fabric with pins.

Make sure to tie up your strings, as shown. This is super important so they don’t get in the way while you’re sewing in future steps.
Don’t use sewing elastic instead of shoelaces, because elastic has latex, which many people cannot wear — consider this if you’re donating masks. And elastic cannot be bleached, therefore the mask cannot be properly sanitized.
Step 6: Lay the second piece of fabric on top, pattern-side down, and pin the pieces of fabric together.

Keep the shoelace strings in the center, so they don’t get pinned and accidentally sewn.
Step 7: Sew a ¼” border around the perimeter, except for a small opening in the middle.

I’ve marked the stitch lines in red on the image above. Sew ¼” from the edge of the fabric.
Be sure to reinforce the corners where the laces are attached so they are very secure. Do this by going back and forth over the corners a few times.
The purpose of the space is to leave a spot where you can reverse the fabric so the pattern shows. It doesn’t have to be exactly in the middle, but don’t make it near a corner. If you leave 1.5″, that’ll work.
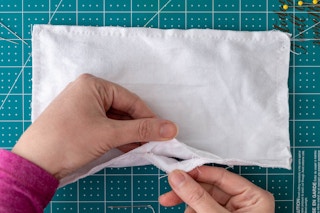
Step 8: Reverse the mask so it’s right side out.
Your ties should be dangling off the ends after you reverse the fabric. Don’t worry, you’ll stitch over the small opening at the bottom soon!
Step 9: Create three folds (or pleats) in the fabric, holding it in place with pins.

Make three even folds in the mask so that when it’s worn, it will spread across the face while still staying tight at the sides. Do this in the same way you’d make a paper fan and then secure the folds with pins.
Step 10: Sew the perimeter of the mask.
If you don’t have a sewing machine and don’t want to sew it by hand, this is where you’d pass the mask off to your neighbor friend who has one. It’s possible to do this step without a sewing machine, but it’s more time consuming because the layers are so thick.
Make sure you’re using a heavy-duty needle for your machine. Sew slowly in order to catch all the layers, and reinforce the perimeter stitch with a second stitch about ¼” away so your mask is basically indestructible.
And be sure to sew over that opening at the bottom!

Boom! You have a completed, homemade surgical mask to wear to the grocery store or to donate to first responders.
Download the KCL app to add and redeem coupons in store


For iOS and Android users.
Get all the new deals and savings hacks straight to your inbox
Will be used in accordance with our Privacy Policy