
Even the most non-crafty mom can dominate these DIY baby projects. Trust me… if I can do it, you can too.
Take a look at these 11 things you can make at home for your baby to save up to $300:
1. Make and freeze your own baby food and save $50-$100 per month.
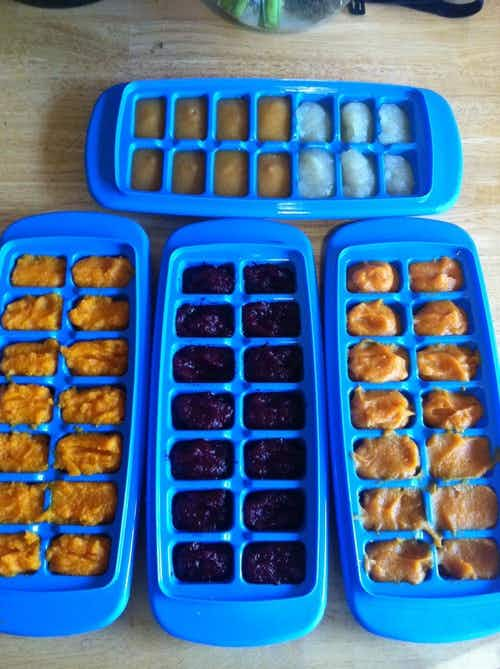
After your baby starts eating solid food, it can cost anywhere from $50-$100 per month just to buy jars of food from the store.
Instead — boil, steam or bake fruits and veggies until they’re cooked and softened. Some veggies include beets, sweet potatoes or yams, butternut squash, and carrots, or try fruits such as apples, peaches or pears. Once the fruit or veggies are softened, puree in a blender until it’s smooth.
Pour the puree into ice cube trays and freeze.
The cost per serving is a fraction of what you’d actually pay for baby food in the store.
Find full instructions on Will Run For Food.
2. Create no-sew up-cycled bandana bibs with old shirts to save $3 per bib.

Via Mostaza Seed
You’ll need old T-shirts, a tape measure, scissors, fastener snaps and an easy attacher kit. Depending on the size of the shirt, you should be able to get up to three bibs per shirt.
Cut out a square, fold diagonally, and trim the sides if you need to, then attach the snap fasteners with an easy attacher kit. That’s it!
Find full instructions on Mostaza Seed.
3. Make a no-sew baby wrap and save $45.
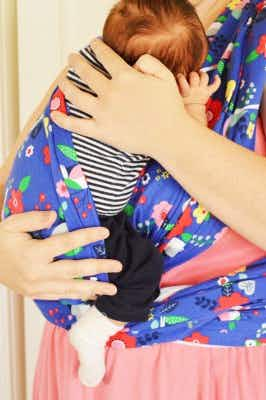
A Moby baby wrap from Target is about $45. Instead, make a no-sew baby wrap for pennies on the dollar.
You’ll need to find a stretchy fabric — think T-shirt material. I tend to buy fabric from Hobby Lobby with a 40% off coupon. A standard wrap is six yards long, which can be a bit long for most people, so aim for 5.5 yards when getting fabric.
The only materials you’ll need is the fabric and scissors… for real. Since most fabric is 45 inches wide (too wide for a wrap), cut it down the middle, and you’ll end up making two wraps!
For under $25 you’ll have made yourself not one, but two baby wraps! That’s half the cost of buying one from the store.
Find full instructions on Penny Pinchin’ Mom.
RELATED: 26 Hobby Lobby Hacks That’ll Save You Hundreds
4. Make a baby beanie from upcycled T-shirts and save $2 each hat.
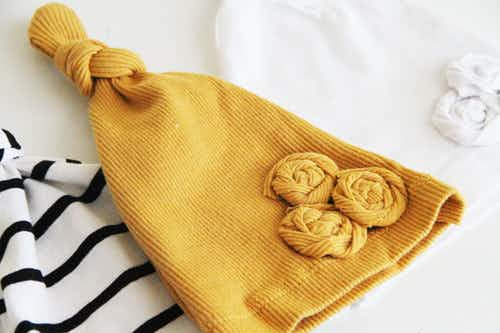
You’ll need an old T-shirt (or jersey knit fabric), a pen to draw the shape of the hat, scissors and a fabric fusion adhesive pen that costs under $4 on Amazon.
Trace the shape of the hat on the bottom of the shirt and cut out the front and back. Then use the fabric fusion adhesive pen (which is non-toxic) to apply the glue to the inside edges of the hat.
Let the adhesive set overnight and then dress your baby in your latest creation!
Find full instructions on Alisa Burke: Redefine Creativity.
5. Save $35 when you sew a duo car seat cover and nursing cover.
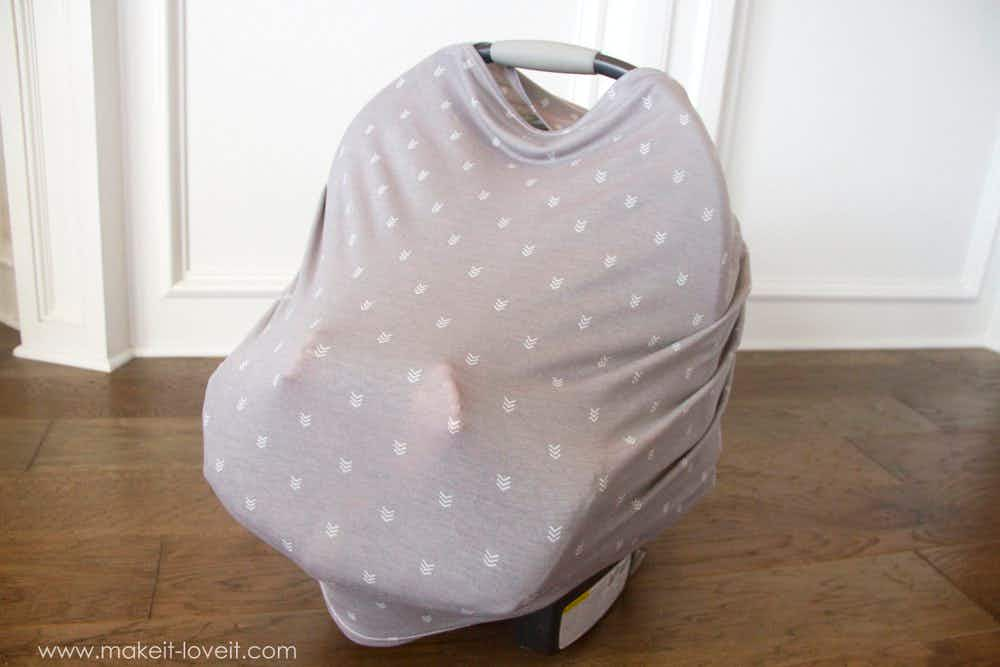
Via Make It Love It
Warning: you will need a sewing machine for this project — but I promise it’s very simple and easy to make!
Sure, you can buy a Milk Snob cover for $35, but then again, with a little time and (a lot) of patience, you can make one that looks identical for a fraction of the cost — especially when you use a coupon to purchase the fabric at JoAnn, Michaels or Hobby Lobby.
You’ll need to get one yard of stretchy knit fabric — we found this same fabric at Hobby Lobby for under $5 with a 40%-off coupon — a sewing machine and basic sewing supplies like scissors, pins and thread.
Create a pattern out of paper before cutting the fabric so you can be sure it’ll work. After you’ve cut your fabric, fold it in half to make sure the sides are symmetrical. Trim if necessary.
Find full instructions on Make It Love It.
6. Braid a pacifier clip with old T-shirts so you don’t lose binkies, and save $10 each.
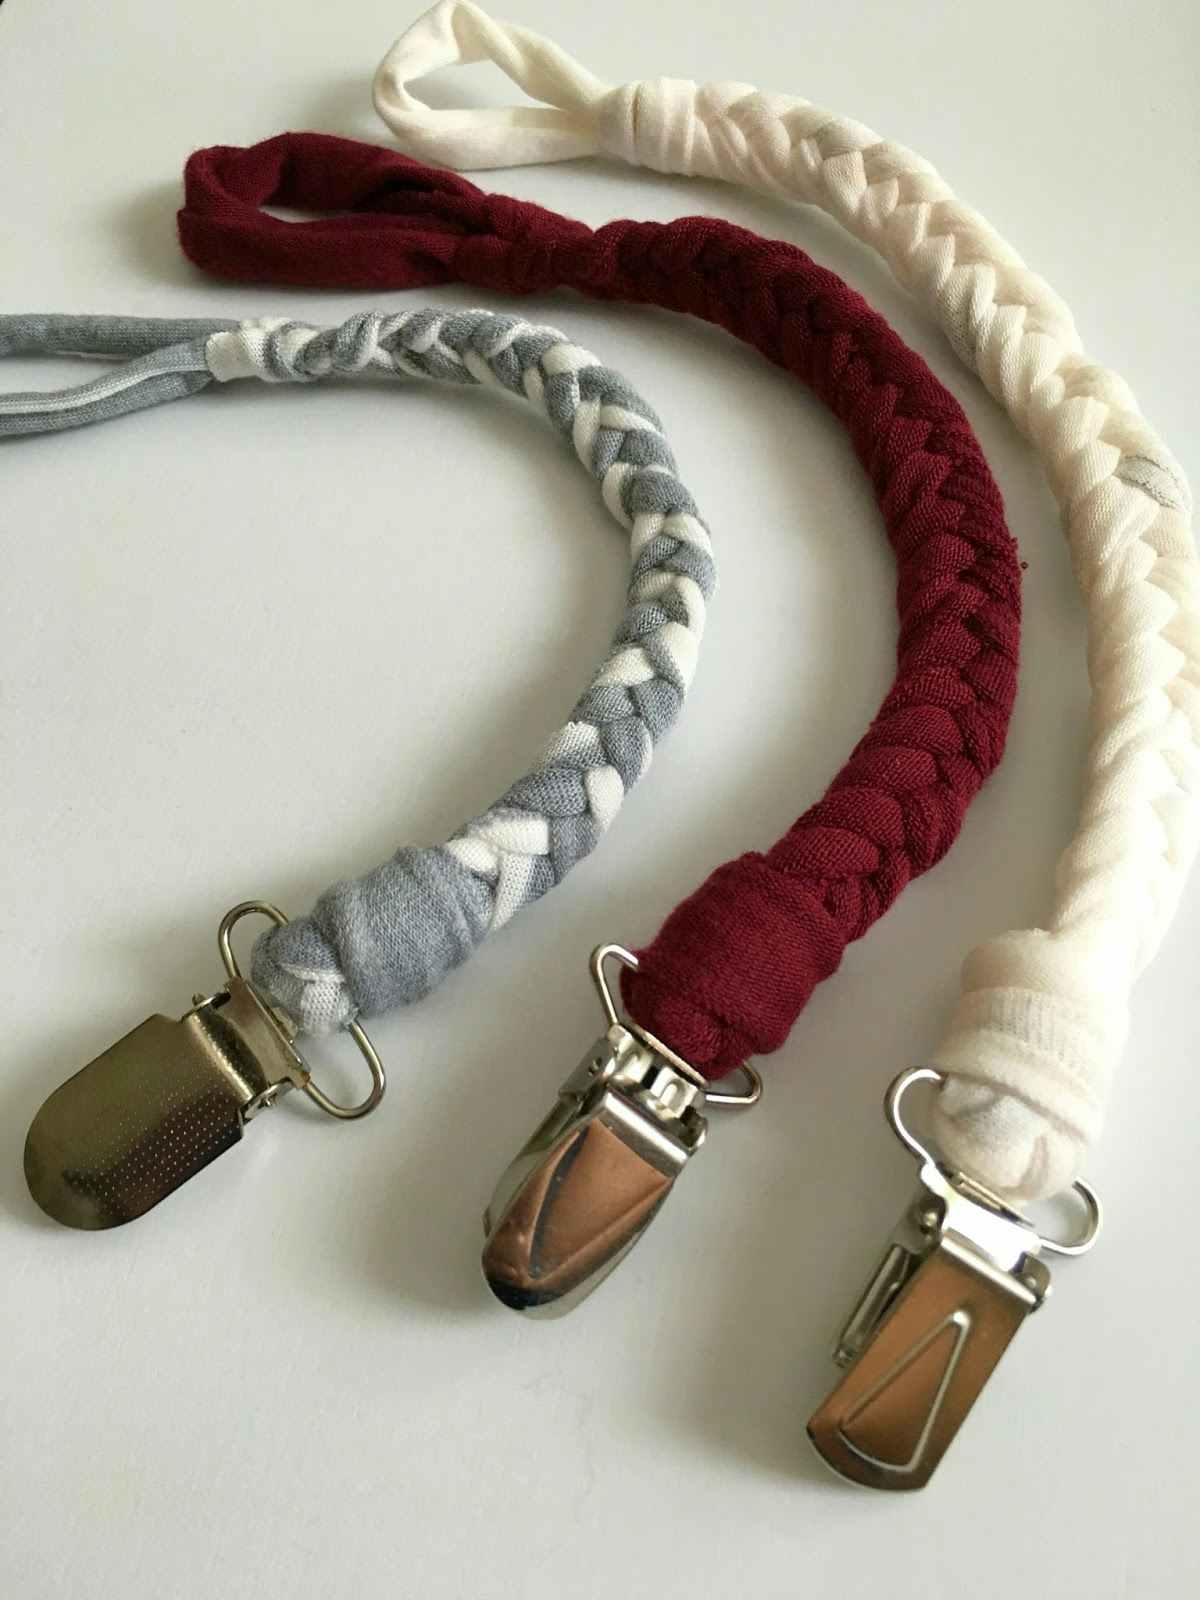
Making a braided pacifier clip is cheap and super quick. Grab ¼ of a yard of jersey knit fabric (between 45-60 inches wide), or use old T-shirts (because they’re free), fabric adhesive and metal pacifier/suspender clips.
Start by cutting a two-inch strip of the full length of the fabric and then cut that strip in half. Use a clipboard or a friend to hold the strips of fabric so you have four pieces to work with. Braid the fabric however you know how — a French braid, fishtail, basic braid… whatever works. Once the braid is as long as you’d like, put the metal clip on the braid, and wrap tightly to hold it in place and secure with fabric adhesive.
If you use old T-shirts, you’ll spend about $10 to make up to 30 pacifier clips!
Find full instructions on Live a Little Wilder.
7. Use wooden beads and string to make a nursing necklace to save $15.
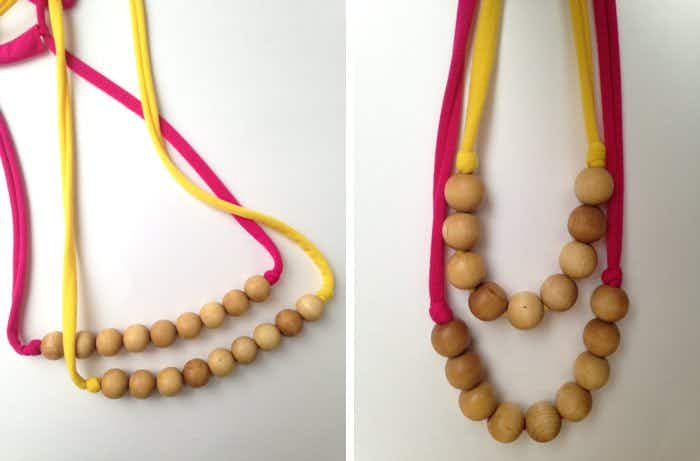
Via Laura Radniecki
All you need to make a nursing necklace (that literally takes like five minutes to make) is string or cord and wooden beads. Thread wooden beads onto the string or cord, and make knots if you want some separation between the beads. Coat the beads with coconut oil to seal them.
You can get the supplies for well under $10.
Find full instructions from Laura Radniecki.
8. Make baby moccasins out of felt — even if you aren’t good at sewing — to save $15-$20.
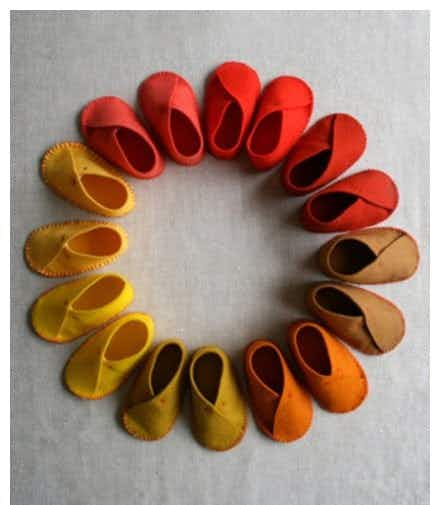
You’ll need pins, a needle, scissors, felt, thick thread and tailor’s tape. From there, you’ll just cut out four pieces of felt, pin the fabric, and use an overlap stitch that runs along the circumference of the entire sole.
Find fabric at Hobby Lobby, JoAnn or Michaels with coupons to save at least 40%. We found felt at Hob Lob for $3.50!
Find full instructions on The Cute Company.
9. Make no-slip socks for your toddler with puffy paint to save $1 per pair.
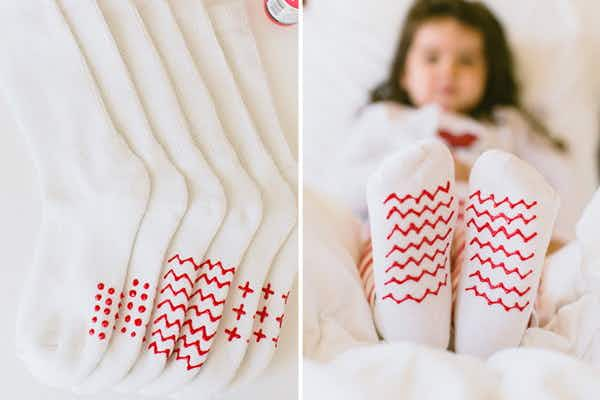
Via Hello Bee
Don’t spend a dime on no-slip socks for your baby or toddler. Instead, use socks they already have and any color puffy paint that typically costs under $1.
Draw designs on the bottom of the socks: dots, zig-zags, hearts… whatever you want. Let dry for 24 hours.
Find full instructions on Hello Bee.
10. Save $2-$5 when you make no-sew headbands.
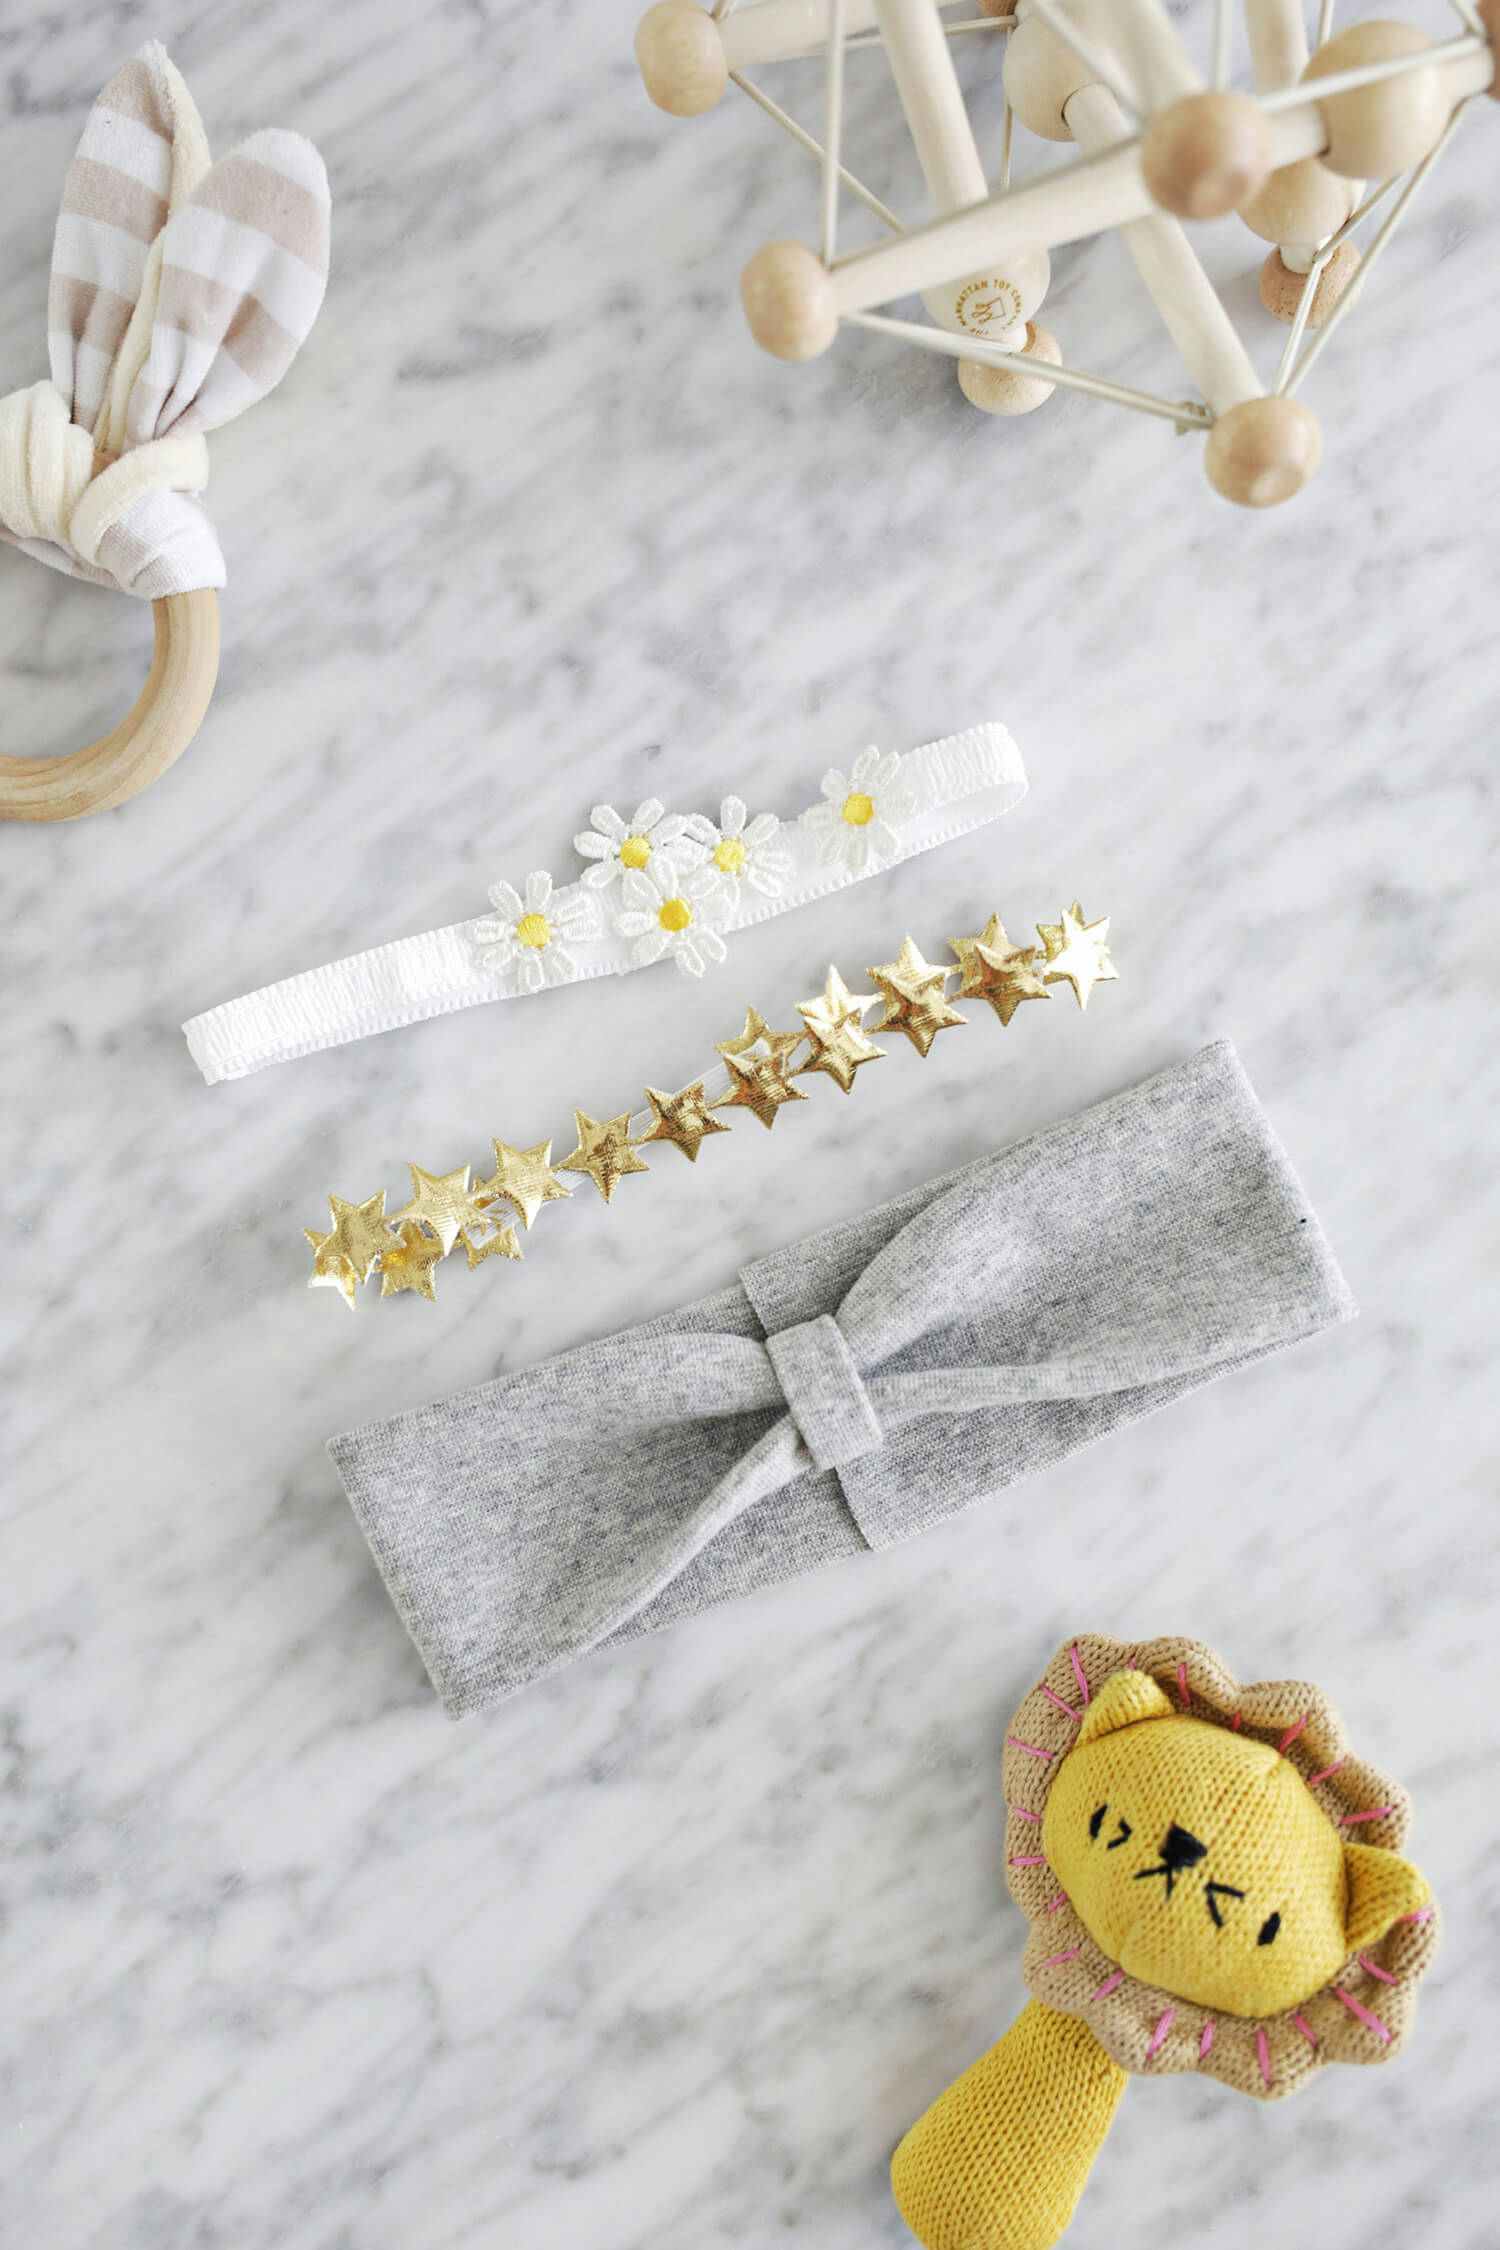
Via A Beautiful Mess
To make these three easy headbands, you need ruched elastic, daisy trim (or any trim you like), stretch knit fabric, ¼-inch elastic trim, a rotary cutter, ruler, scissors and quick-dry fabric glue or a glue gun.
Cut the ruched elastic ½ inch longer than your baby’s head circumference. Cut the daisies off the trim, and apply them to the ruched fabric in any pattern you like using fabric glue or the glue gun.
For the rest of the instructions for the other two headbands, go to A Beautiful Mess.
RELATED: 27 Michaels Store Hacks You Need to Know
11. Use a stencil and fabric paint to make printed leggings to save $5-$10 each.
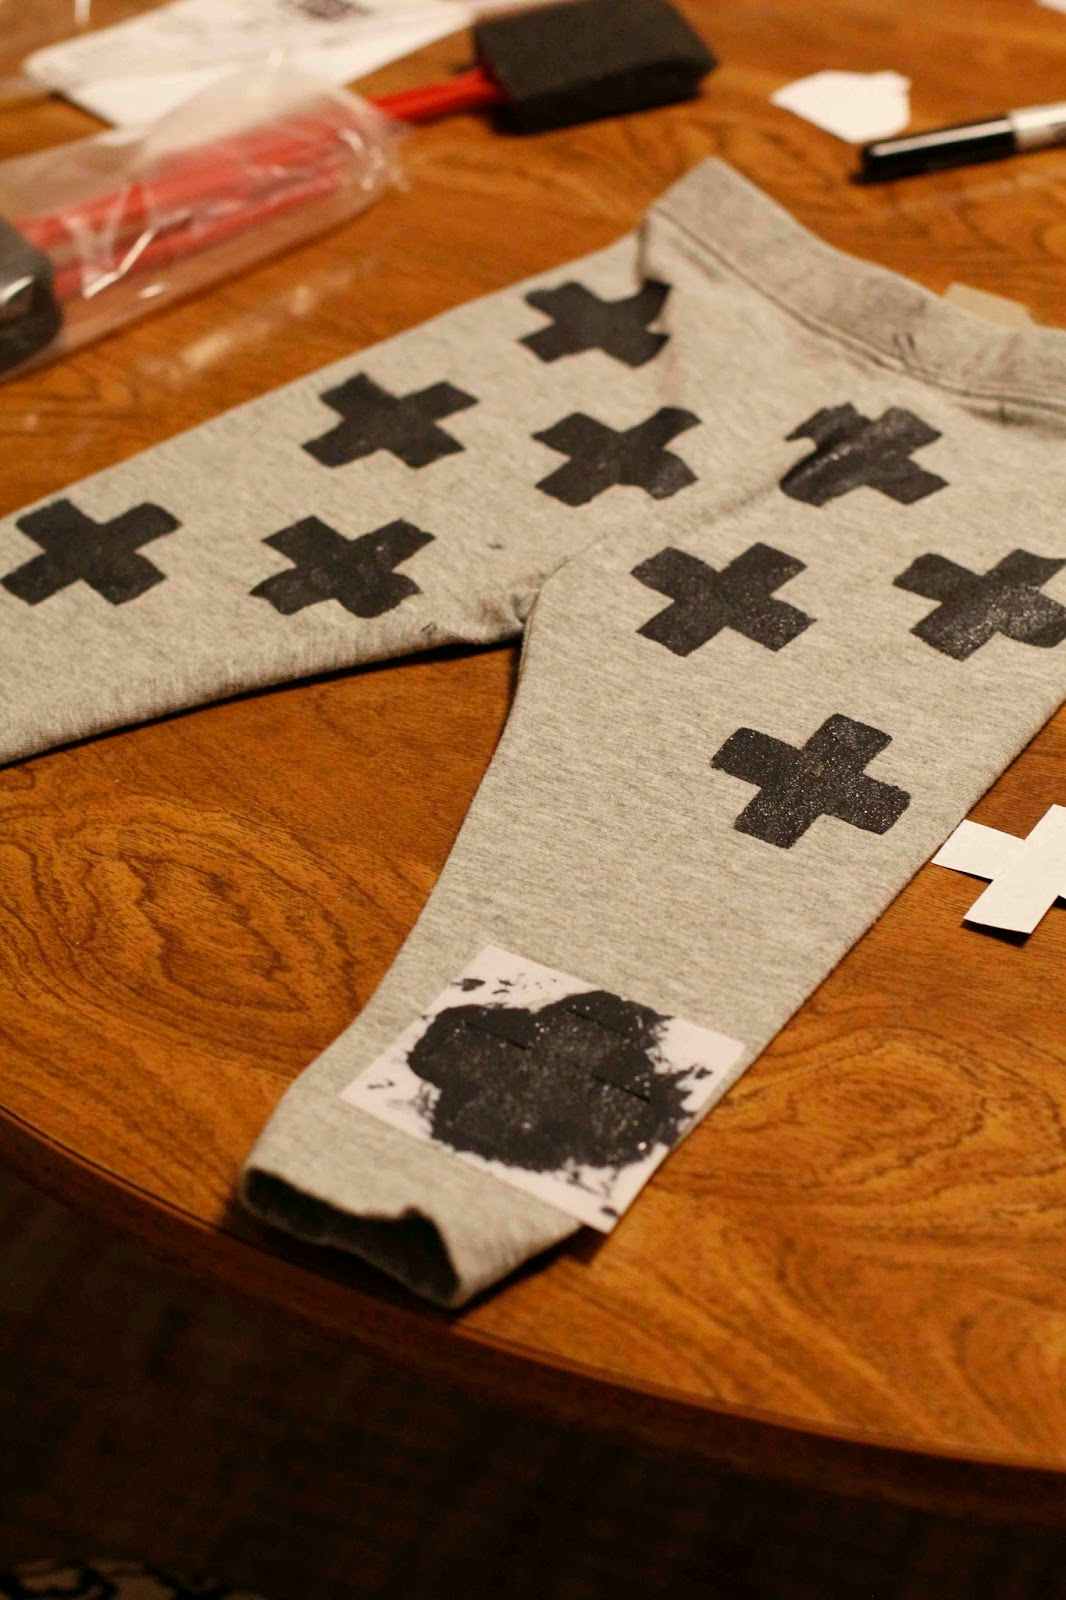
Get fabric paint, foam brushes, an X-ACTO knife, and a blank stencil sheet, and find your favorite images like deer antlers, arrows or Aztec prints. Print the image on white paper, tape it to a blank stencil sheet, and use the X-ACTO knife to cut along the shape.
Make small inserts out of cereal boxes or newspaper to put on the inside of the leggings so the paint doesn’t bleed through. Set the stencil on the leggings, and use whatever color fabric paint you like. Once you’re all done, let the leggings dry for four hours.
Use the steam from your iron to set the paint, and then wait 72 hours before washing and drying the leggings.
Find full instructions on Breakfast at the Zemke’s.
UP NEXT: 10 Sneaky Ways to Burn More Calories


Tell us what you think