
Get all the new deals and savings hacks straight to your inbox
Will be used in accordance with our Privacy Policy
Paint is one of the easiest and cheapest ways to give your space a facelift. Whether you’re a newbie or have been painting for years, there are always painting tips to learn.
We’ll cover ways to save money — from where to buy the most affordable painting supplies, how to paint a room, and full blown painting tips to how to store your materials. These 21 painting tips can help you start and finish a project like a pro and save money while doing it. Be sure to work in a well-ventilated area with enough light so you can see the beauty in your work.
(Psst…one of the best ways to stay on top of home improvement deals is to download the KCL app.)
1. Never pay full price for painting materials.

Here are a few money-saving tips before you spend on painting materials:
- If you buy a color sample at Ace Hardware, you’ll get a $5 coupon for one gallon of paint.
- The Sherwin-Williams’ paint calculator helps you determine how much paint you need. Just enter your room dimensions and it will calculate what’s needed.
- Home Depot and Lowe’s both sell mistint — or “oops paint” — that customers return because it’s the wrong shade. These are deeply discounted paints ($1-$5) in pint or gallon sizes.
Still looking for more ways to save on paint?
2. Find budget-friendly painting materials at Dollar Tree.

You could also buy a Dollar Tree shower curtain and use it as a drop cloth. Once you’ve covered your floors in brown paper (see Tip 8), use the shower curtain to catch paint drips. It can also easily be moved around the room.
And, don’t forget about your knees! Pick up a gardening pad and use it as a kneeling pad when you paint baseboards.
RELATED: 22 Things Every Shopper Should Know About Dollar Tree
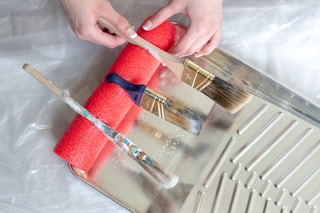
3. For wall painting, don’t skimp on good brushes and roller covers.

Need help on what brush goes with what paint and area? Here are some PRO TIPS:
- Natural paintbrushes = oil-based paint
- Synthetic paintbrushes = water-based paint and acrylic, latex-based paint
- Small brushes = trim, corners, tight areas
- Medium brushes = shelves, cabinets, doors
- Large brushes = walls, ceilings
When you’re painting along detailed spaces like woodwork, I recommend a 2-inch Shortcut Polyester Angle Sash Paintbrush. It’s great for cutting edges and getting a clean line.
4. Should you paint trim or walls first?

Once your ceiling and baseboards are painted, work one wall at a time to avoid creating what is called a “halo.” This occurs when paint around the edges fully dries before rolling the wall. Rolling the paint while your edges are still wet will create a more seamless look.
5. Get ready for room painting by filling holes and sanding rough spots.
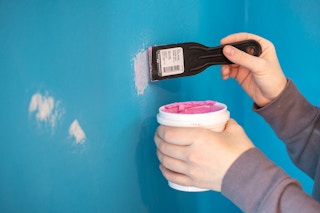
- Sand uneven surfaces with a sanding block or sanding sponge
- Fill/repair holes with spackle
- Apply a coat of primer over the repaired areas
Once you learn how to prep walls for painting, you can apply it to each room that you have, and your space will look like it was painted by a pro. Be sure to remove electrical cover plates and doorknobs (if you’re touching up those areas) and cover them with painter’s tape (see Tip 13).
6. Use a microfiber cloth attached to a push mop to make wall painting smoother.

Just use a mild soap and lukewarm water. The broom will rid the wall of spider webs, dust, grease, and stains. Use an old paintbrush to dust baseboards and window seals.
7. Label the lid of each can with the room it belongs to as a smart painting tip.

When it’s time to touch up the paint, you can reference the color, sheen of paint, and the number of gallons needed. Be sure to speak to a painting professional to determine how much is needed to paint a room.
8. Use builder’s paper as a recyclable painting material to protect floors.

An inexpensive and easy way to add protection to wood floors is to lay down brown builder’s paper (also known as brown kraft paper). To prevent it from slipping, hold it in place with strips of painter’s tape. If this is too hard to find, a fabric drop cloth, old bed sheet, or newspaper can work too.
9. Hold painting materials with a pool noodle.


10. Invest in a store-and-pour can lid as an easy, mess-free tip for painting a room.

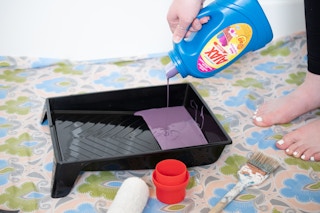
11. Use pantyhose as a wall painting hack to filter rust and dried paint chunks out of old paint.

You can find new cans in the paint supply section at your local hardware store. Carefully pour the paint from the old can into the new one, straining out the undesired bits as you do.

12. Use tape as a guide for how to prep walls for painting.
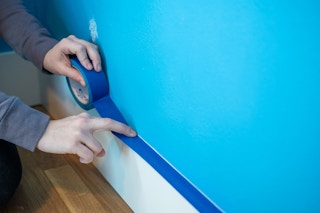
- Use a flexible pallet knife to press down the painter’s tape where it meets the wall. This prevents leaks under your tape and ensures a good bond.
- Use the side not sticking to the baseboard to guard the floor and board from paint drips.
- Don’t flood the tape! Avoid brushing large amounts of paint where the wall and tape meet.
- If you’re trying to create a straight line without paint spreading to your trim, start by sweeping paint onto the wall with an angled brush, a small distance away from your “line.” Don’t reload your brush. Make a second pass coaxing the paint already on the wall a little closer to the line.
Doing this will help you keep control of the paint and not push too much of it where it’s not wanted. A third pass may be necessary to perfectly cut in your straight line.

13. Score the edge of painter’s tape to keep it from pulling wall paint off.

When you’re done painting, peel off the tape for a completely clean surface. For easy cleanup, cover exposed switches and outlets with painter’s tape.
14. Use a rubber band to easily scrape off extra paint.

Doing this repeatedly will keep the lip clean and save you from wasting more paint. Plus, you can rest the paintbrush on top of the rubber band so that additional drips can go straight into the can.
PRO TIP: Natural brushes hold more paint but result in a smoother stroke.
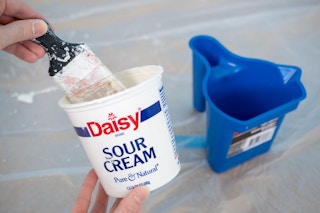
15. Learn how to touch up wall paint easily with a small food container.
16. Prepare paint rollers for wall painting by trimming and lubricating them.


RELATED: 10 WD-40 Hacks You’ve Never Heard Before
17. Use a broomstick to paint a room with tall walls.

18. Keep brushes from drying out with a disposable glove.

19. Store a wet roller in a clean Pringles container when you’re finished room painting.

Stick the wet roller in the can, pop on the lid, and store it in the refrigerator. The next day, just slide it back onto the roller frame and continue the project.
Another option is to wrap it in plastic wrap, wash it, or store it in a Ziploc bag. Now get to snacking! Stock up on Pringles coupons so you can use this hack.
20. Invert paint cans as clever storage ideas.

Another painting hack is to store the extra paint in an old laundry detergent bottle. It’s easy to pour, has a screw-top lid, and has a handle. KCL has plenty of laundry coupons to make this tip a reality.
RELATED: 11 Unexpected Ways to Repurpose Plastic Laundry Detergent Containers
21. Add heavy paper to your painting materials list to keep your bristles from bending.

An alternative method is to seal the wet brush in a vacuum sealer.
Download the KCL app to add and redeem coupons in store


For iOS and Android users.
Get all the new deals and savings hacks straight to your inbox
Will be used in accordance with our Privacy Policy