
Get all the new deals and savings hacks straight to your inbox
Will be used in accordance with our Privacy Policy
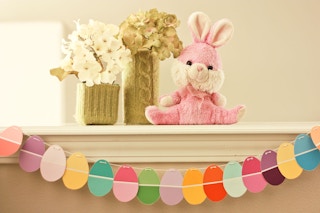
That famous rabbit handing out candy to well-behaved children isn’t the only one with surprises up his sleeve this Easter. That’s right, you’re going to craft. And you’re going to craft with kids. Listen, not everyone came out of the womb knowing how to use power tools or a Cricut machine. So we’re going to arm you with some easy Easter crafts literally anyone can do. Seriously. Okay, one might involve a drill, but that’s it.
Whether you believe in the Easter bunny or not, here’s an opportunity to engage in fun, messy, and colorful Easter activities for kids (and adults).
Get inspired for spring with these ridiculously easy Easter crafts for kids or really anyone. To save on supplies and beyond, make sure to download the free The Krazy Coupon Lady app.
1. Make emoji Easter craft eggs with paint and markers.
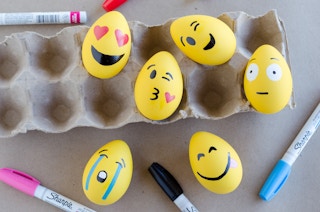
These emoji eggs are a fun way to decorate without messy dye. Younger kids can decorate them with stickers, and older kids can use paint markers.
What you need:
-
Paper mache eggs
-
Yellow craft paint
-
Oil-based paint pens
To make these emoji Easter crafts for kids, you’ll need paper mache eggs (easier IMO, and these days, cheaper) or blown-out eggs (empty shells with the contents removed), yellow craft paint, and for the faces.
Directions:
-
Start by painting the eggs yellow and let them completely dry.


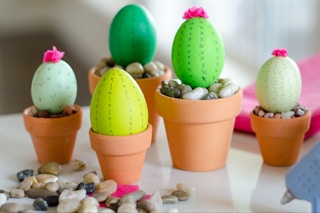
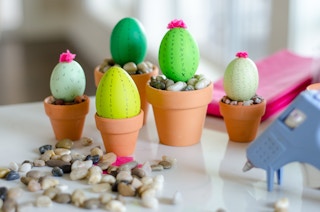
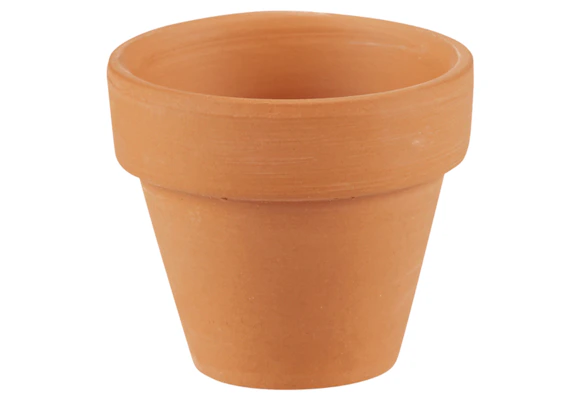
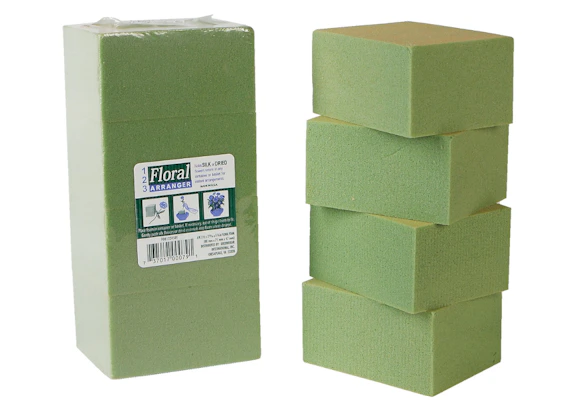
2. Paint or dye craft eggs and set them in terra-cotta pots for cactus Easter eggs.
What you need:
-
Craft eggs
-
Green egg dye (or paint for the craft eggs)
-
Fine tip black marker
-
Small terra-cotta pots (terra-cotta pots at Dollar Tree are about $1 each)
-
Decorative gravel
-
Floral foam (Dollar Tree is another great resource)
-
Small wooden dowels or skewers
-
Tissue paper (optional)
Directions
-
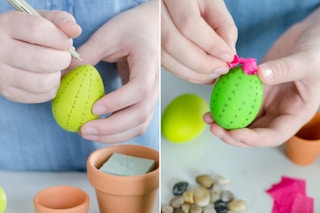
Paint the craft eggs with your desired shade of green. After they fully dry, use a fine-tip black marker to draw on “thorns” (little “X’s” down the egg).
-
Cut small pieces of floral foam and place them in the bottom of each pot (to require less decorative gravel).
-
Insert a small (trimmed to size) wooden dowel or BBQ skewer into the bottom of your craft egg. Then stick the egg/dowel into the floral foam for a secure fit.
If you like, take squares of scrunched-up pink tissue paper and glue them to the top of the eggs for blossoms. Fill the pot with decorative gravel, and you’re good to go!
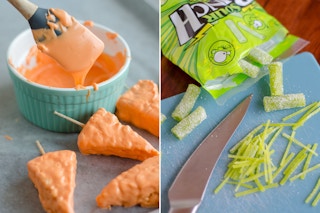
3. Make easy Easter desserts with Rice Krispies, candy melts, and sour candy.
What you’ll need
-
1 box of Rice Krispies Treats
-
Orange candy melts
-
Apple Sour Punch Bites
-
Edible Easter grass or Rips licorice candy
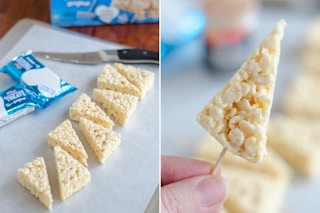
Directions
-
Cut each Rice Krispies Treat diagonally in half. For best results cutting, run your knife under hot water, wipe dry, and cut the Rice Krispies Treat while the blade is still hot.
-
Insert a toothpick in the base, and place on a cookie sheet lined with parchment paper.
-
Repeat for each cut.
-
Place in the freezer for 10 minutes. While the treats are firming up, melt down the orange candy melts as directed on the package.
-
Dip each Rice Krispies Treat into the candy melt, or use a spoon or spatula to help evenly distribute.
-
Return to the cookie sheet and set in the fridge until the candy has hardened.
-
Cut your Sour Punch bites into slices. Carefully remove the toothpick and use it to widen the hole.
-
Insert the sliced candy into the hole, and use a small dob of candy melt to secure it in place.
-
Add the dried treats into a basket filled with edible grass or sliced licorice pieces. These treats are perfect Easter basket ideas for kids.
Shop supplies on Amazon:

4. Turn a potato into an art brush for an easy Easter craft for toddlers.
What you’ll need:
-
Potatoes
-
A knife
-
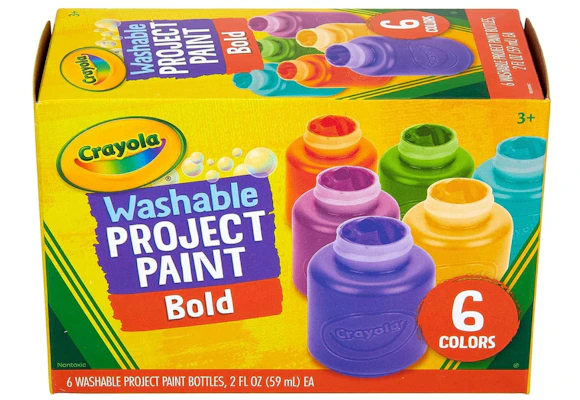
Acrylic paint
-
Paintbrush
-
Paper
Directions:
-
Cut a russet potato in half and carefully carve out lines, dots, or other designs in the potatoes.
-
From there, your kids can use the paintbrush to apply multiple colors on the potatoes and then stamp on the paper!
Shop supplies on Amazon:
5 . Attach plastic eggs to string lights for a DIY Easter craft idea.
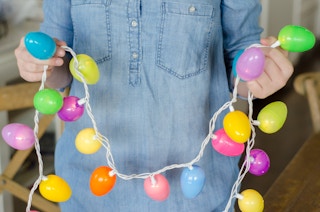
What you’ll need:
-
String lights
-
Plastic Easter eggs
-
Drill and drill bit (the size of the bulbs on your string lights)
-
Block of wood
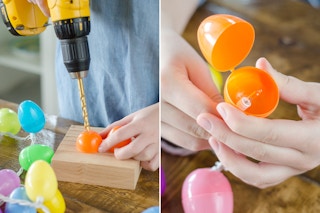
Directions
-
Open the plastic eggs and set one side on the wood block to prevent the drill bit from damaging the surface you’re working on.
-
Using a drill bit the same size as the light, slowly (and carefully) drill into your plastic egg. If there’s a small hole at the end of your egg (as most plastic eggs have), try drilling into that hole. Your egg will be less likely to crack.
-
Insert the light into the end of the egg, and you’re done!
This is an easy Easter craft for adults looking to decorate an entryway, for a party, or even for hanging in an older child’s room.
Shop supplies on Amazon:


6. Use a brown paper bag and pom-poms to make an Easter Bunny craft.
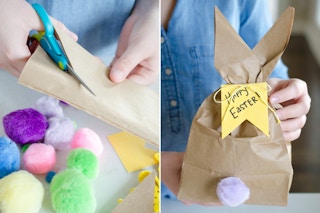
What you’ll need:
-
Brown paper bag
-
Colorful pom-pom
-
Gift tag (or you can make one out of any color paper)
-
Twine or string
-
Hot glue gun
-
Scissors
Directions:
-
Prepare to cut the bag by folding it in half. Draw a diagonal line from the top outer edge of the bag down toward the folded side. This will help you achieve a nice even “V” for the ears. Make the cut.
-
Fill the bag with lunch, Easter eggs, candy, or any other Easter goodies, and wrap with twine or string and the gift tag.
-
Glue on a pom-pom ball as the nose, and you’ve got yourself the cutest Easter Bunny lunch bag!
Shop supplies on Amazon:


7. Use food coloring and white flowers for a fun centerpiece and springtime “science” experiment.
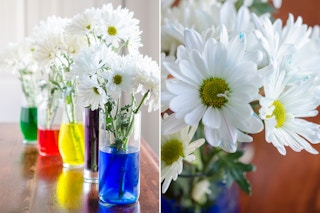
What you’ll need:
-
White flowers
-
Glasses or glass vases
-
Food coloring
Directions:
-
Determine how many colors you’d like to experiment with, and fill each glass with water and food coloring.
-
Cut the stem of each flower at an angle to allow your flowers to “drink up” as much water as possible.
-
Set one flower in each glass and wait!
-
Watch as your white flowers change color!
8. Repurpose candy boxes into Easter basket ideas for kids.
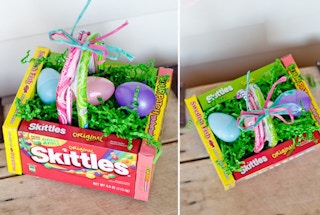
What you’ll need:
-
4 theater box candy boxes
-
2 Laffy Taffy or Nerd ropes
-
Glue gun
-
Cardboard
-
Fake grass
Directions:
-
Glue the candy boxes together as shown.
-
Cut out a piece of cardboard that will fit the bottom of the “basket,” and glue it to the bottom of the candy boxes.
-
Hot glue one end of the Laffy Taffy or Nerd rope to the center and top of the candy box.
-
Glue the other end of the rope to the center of the other box of candy. Do this one more time with the remaining rope.
Fill the basket with grass and goodies. This can be an Easter craft for adults as well. Your coworkers will love it. We recommend grabbing your candy and Easter grass at the dollar store for the best price!
Shop supplies at Dollar Tree stores:


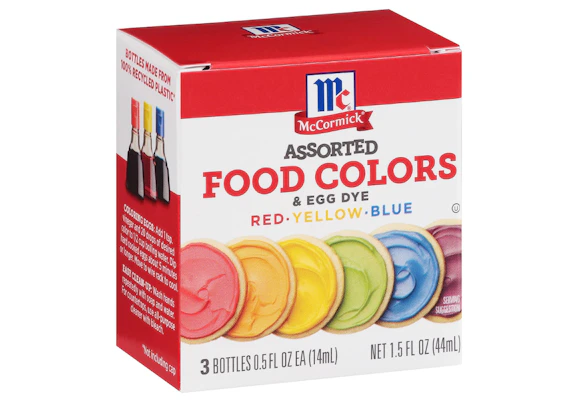
9. Dye eggs with Kool-Aid for a colorful Easter egg craft.

What you’ll need:
-
Several different Kool-Aid flavors
-
Water
-
Short, clear glasses or cups
-
Spoons
Directions:
-
Pour one envelope of each Kool-Aid color into its own cup
-
Add 2/3 cup water into each cup (or short, clear plastic cups)
-
Stir to dissolve the drink mix.
-
Use a spoon to place a hard-boiled egg into each cup.
-
Keep eggs submerged until the desired color is reached.
-
As with traditional Easter egg crafts, you can add stickers or draw silly faces with Sharpies.
Shop supplies:


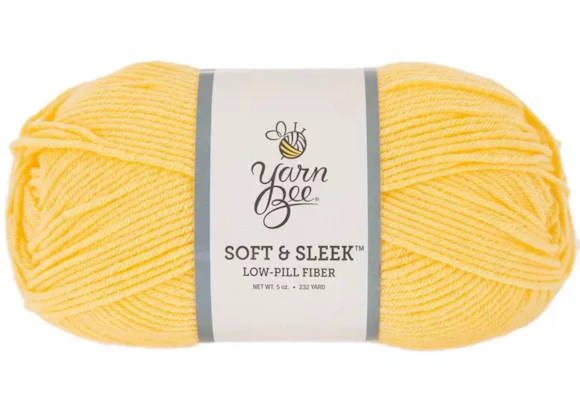
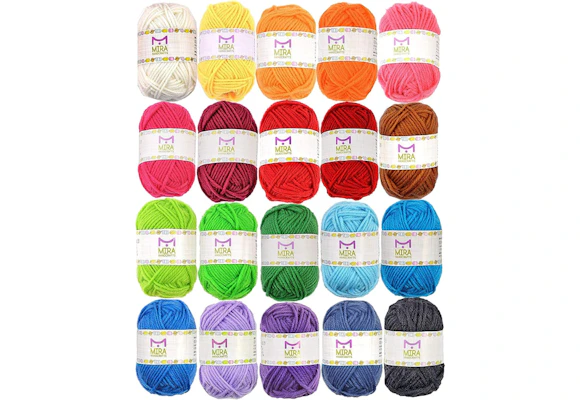
10. Create baby chick Easter crafts with pom-poms and yarn.
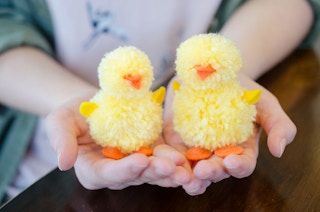
What you’ll need:
-
Orange and yellow felt
-
Yellow yarn
-
Hot glue gun
-
Fork or pom-pom loom
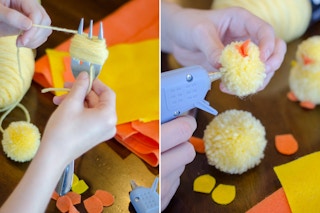
Directions:
-
Use a large fork to make two pom-poms. You’ll want one smaller pom-pom for the head and one larger pom-pom for the body.
-
Cut two “wings” from the yellow felt by stacking two pieces and folding them in half. Cut to achieve an oval with one end lopped off. Then do the same with the orange felt, only make it slightly larger for the feet.
-
Cut two orange Vs for the beak.
-
Glue your “beak” into the middle of the smaller pom-pom, and glue the head onto the top of the larger pom-pom.
-
Fold and add a small dab of hot glue to the end of the yellow wing pieces. Stick it onto the larger pom-pom (the body). Do the same for the orange feet.
When you’re done, you can race the chicks for a fun Easter game for kids.
Shop supplies:
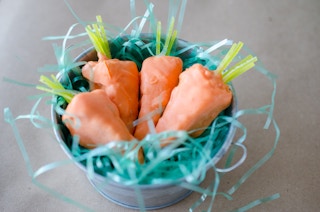
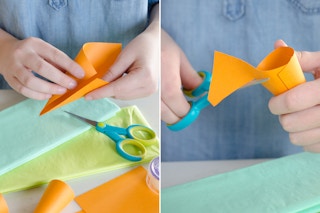
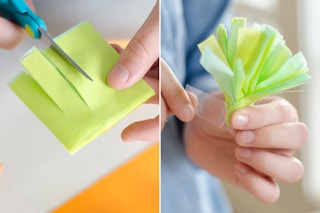
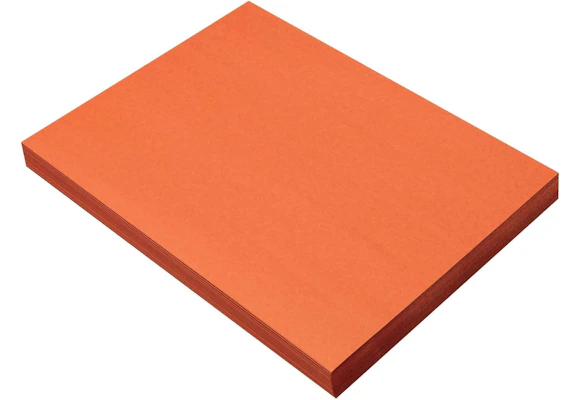
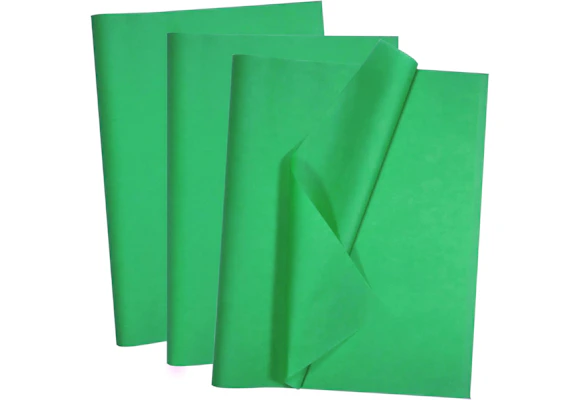
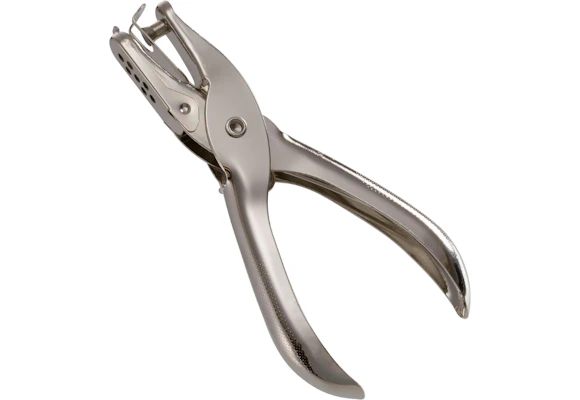
11. Make a DIY Easter craft with cardstock and tissue paper.
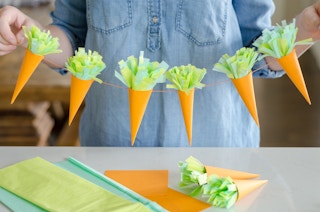
What you’ll need:
-
Orange cardstock or paper
-
Green tissue paper
-
Twine or string
-
Scotch tape
-
Hole punch
-
Scissors
Directions
-
Cut the cardstock or paper into four squares.
-
Curl each piece into a cone shape, and tape or glue it shut. Cut off the excess paper at the opening of the cone.
-
Punch holes on opposite sides near the open end.
-
String the carrots onto twine or string.
-
Cut thin strips of green tissue paper, lay them on top of each other, and fold.
-
Cut the tissue paper so it’s fringed, but don’t cut all the way through.
-
Take paper by the un-fringed edge, twisting and bunching it together; tape to the inside of the pre-strung carrots.
Shop supplies on Amazon:
12. Wrap plastic Easter eggs in yarn for colorful decor.
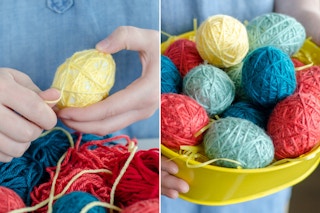
What you’ll need:
-
Plastic Easter eggs
-
Yarn
-
Hot glue
-
Scissors
Directions:
-
Start with a dab of glue on the egg, and attach the end of the yarn.
-
Wrap the yarn around the egg, and add little dots of glue to keep the yarn in place.
-
Continue until eggs are fully covered in yarn.
This Easter egg craft can be used as beautiful table decorations or for an Easter egg hunt around the house.
Shop supplies:
13. Throw eggs filled with paint at a canvas for a fun Easter idea.
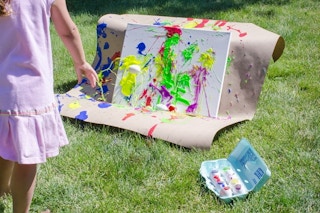
Directions
-
Drain a dozen raw eggs by using a pushpin to make several small holes on top of each egg.
-
Once you’ve made enough pushpin holes, you should be able to easily break away a portion of the egg to remove the yolk and white.
-
Create a large enough hole to pour paint through, then watch your kids have fun creating modern masterpieces!
Given the simplicity of this project and the fun to be had, this can be an appropriate Easter craft for babies (the throwing portion) and toddlers.
TIP: Don’t toss the precious drained contests of the eggs (which is basically liquid gold these days). Store the contents in a container to be refrigerated so you can use them for scrambled eggs or in a recipe requiring eggs.
14. Turn jelly beans and thread into edible Easter crafts.
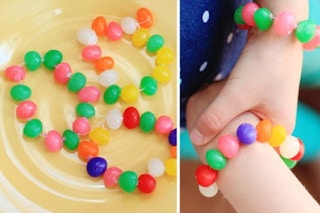
What you’ll need:
-
Jelly beans
-
Thread
-
Needle
-
Scissors
Directions:
-
Thread your needle (a will do)
-
Tie a double knot at the end of your thread.
-
Push the needle through the jelly beans until you have strung enough to form a bracelet or necklace.
-
Cut the thread, tie the ends in a knot, and enjoy your new easy Easter dessert! For sanitary purposes (and if you’re going to eat it), rinse the needle and thread before adding the jelly beans.
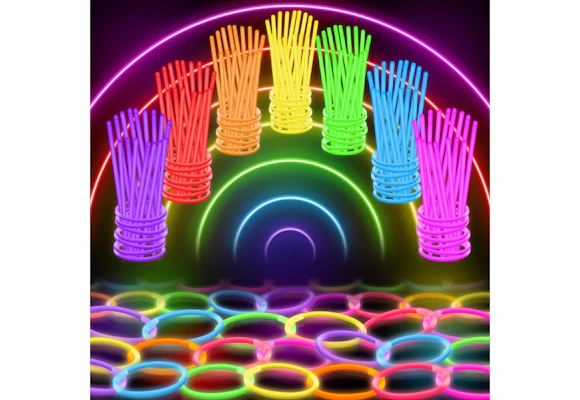
15. Make glow-in-the-dark Easter egg crafts for an epic nighttime hunt.
Directions:
-
To get the spattered look, cut up the bracelets over a sink. This step should be performed by adults so that kids don’t accidentally ingest the substance inside glow sticks.
-
Put a small section of bracelet inside each egg, close up the egg, and shake. (Any stray paint washes off easily with water.)
The glowing effect is shorter when the bracelets are cut up this way, but you will still have plenty of time for a terrific nighttime egg hunt!
For safety purposes, buy .
Shop supplies on Amazon:
16. Make an Easter egg craft out of paper paint chips.
What you’ll need:
-
Paint chips/samples
-
Egg-shaped template (find one online and print)
-
Scissors
-
String
-
Hole punch
Directions:
-
Use the egg template to trace and cut out as many eggs as you like.
-
Punch two small holes in the top of your eggs, thread with string, and hang!
17. Combine food dye + craft paint to make a speckled egg Easter craft.
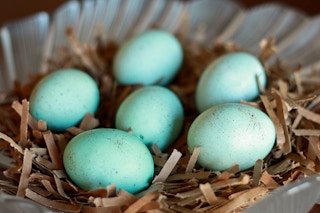
What you’ll need:
-
Blown-out eggshells (see instructions below)
-
Sewing needle
-
Plastic straw
-
Bottle each,
-
White distilled vinegar
-
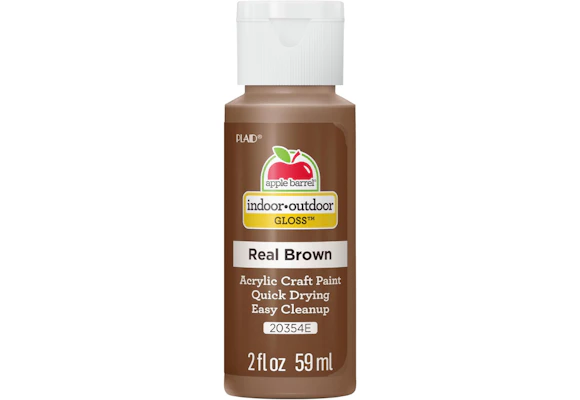
Brown craft paint
-
An old toothbrush
-
A brown paper lunch bag
Directions:
-
To make the blown-out eggshells, first wash the shells of raw, uncooked eggs. Use a large needle or nail to poke a small hole in each end of the eggshell. Stick the needle in far enough to break through the yolk and membranes and then place a straw over one end and blow. The egg whites and yolk should come out as you do this. If it’s not flowing easily, try increasing the size of the hole slightly.
-
Wash out each empty shell, blow out any water, and allow them to dry. Dye your shells in a mixture of one cup of warm water, a few tablespoons of vinegar, four drops of blue, and one drop of green food dye. Shake out any liquid from inside your shells, and let them dry.
-
To speckle your eggs, use an old toothbrush. Dip it into brown paint and then run your fingers over the bristles to flick the paint onto the egg. A brown paper sack shredded makes the perfect nest for your pretty blue eggs.
Shop supplies on Amazon:
Download the KCL app to add and redeem coupons in store


For iOS and Android users.
Get all the new deals and savings hacks straight to your inbox
Will be used in accordance with our Privacy Policy