Get all the new deals and savings hacks straight to your inbox
Will be used in accordance with our Privacy Policy

Ready to finally organize your refrigerator and freezer? You’ve come to the right place. These easy hacks will keep your food organized!
1. Reduce waste by putting expiring food in an “Eat Me First” box.

Via Clossette
2. Stand upside down condiment bottles in an egg carton.

Via Alton Brown
3. Cover your refrigerator shelves with plastic wrap for easy spill cleanup.

4. Glue magnets to the bottom of containers so they stick to the sides of your fridge.

5. Use magazine holders to create freezer shelves.

Via Aunt Peaches
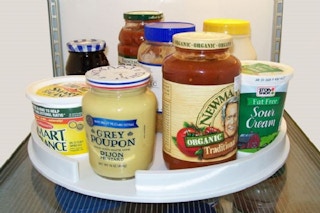
6. Keep things within reach with a Lazy Susan.
Via Rant Chic
RELATED: The Ultimate How-to-Freeze Guide
7. Get neat, easy access to fruit by placing a basket in your crisper drawer.
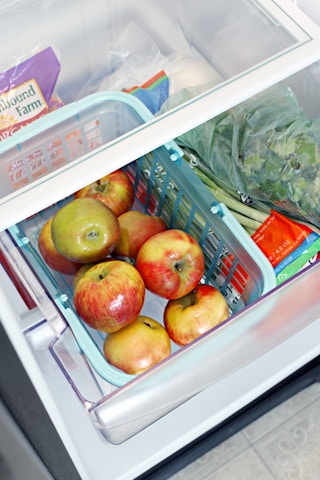
Via Heart Organizing
8. If you have a chest freezer, organize items in reusable fabric shopping bags so you can pull things out easily.

9. Create a kid-friendly snack zone that’s easily accessible.

10. Revamp your fridge with chalkboard paint and stay organized with a written weekly menu.

Via The Kurtz Corner
11. Organize items into food groups with dollar-store baskets.

Place foods and condiments that your family uses together often in designated baskets. Here are some great examples that The Domestic Geek Uses:
- Sandwich basket
- Cheese basket
- Salsa and hot sauce basket
- Meal helper basket
12. Decrease visual clutter by transferring condiments to matching squeeze bottles.

Via Chez Larsson
13. Make more room in a freezer by clipping opened bags underneath a shelf.

Via Pinterest

SaveSave
SaveSave
SaveSave
Download the KCL app to add and redeem coupons in store


For iOS and Android users.
Get all the new deals and savings hacks straight to your inbox
Will be used in accordance with our Privacy Policy